
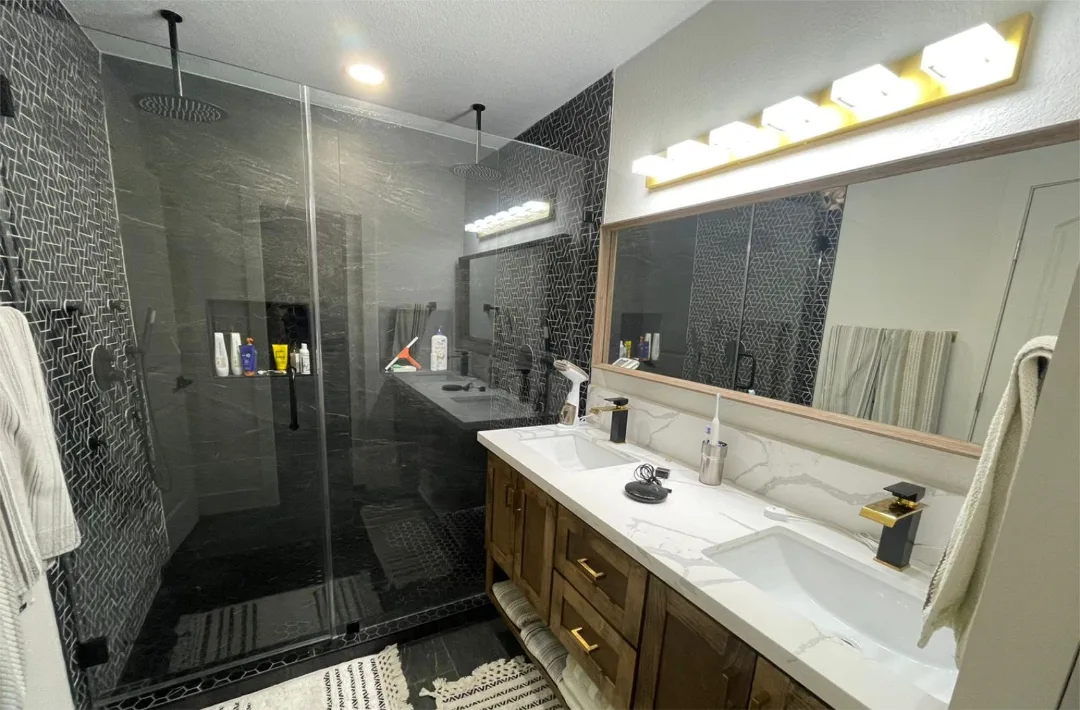




Bathroom Remodeling Houston Tx.
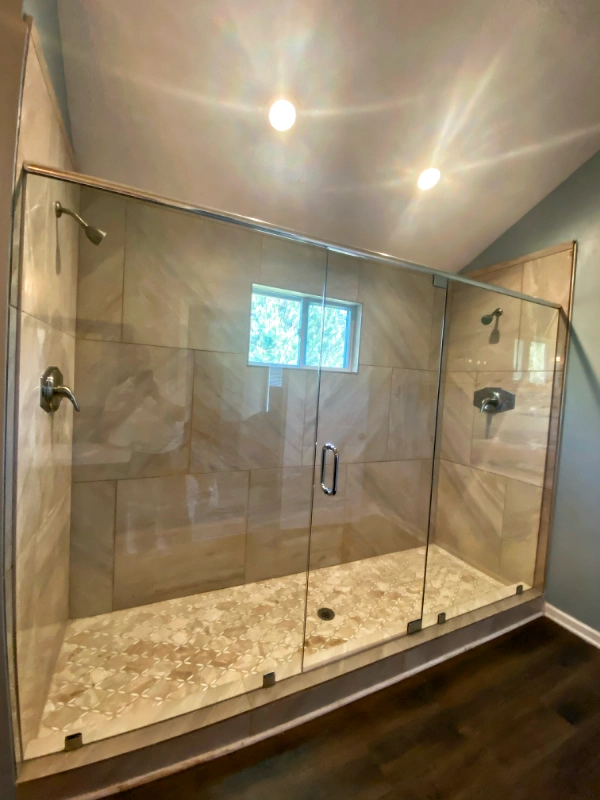
Bathroom renovation depends on what the client wants, for example many of our clients are choosing to eliminate the tub and prefer a much larger walking shower. This depends on the space in the bathroom. Others choose to upgrade the standard tub and install a freestanding tub with whirlpools and a large shower with double shower heads.
It is a process that includes demolition, plumbing work, floor preparation for the shower, installation of tile, tub, shower heads, faucets, custom vanity, mirrors, light fixtures and shower door.
Each design is different according to the needs of our clients. We make niches for the shower walls, benches inside the shower, corner shelves in quartz.
Types of Shower Heads
1. Handheld
2. Ceiling mount rainfall
3. Rainfall
4. Double cascade
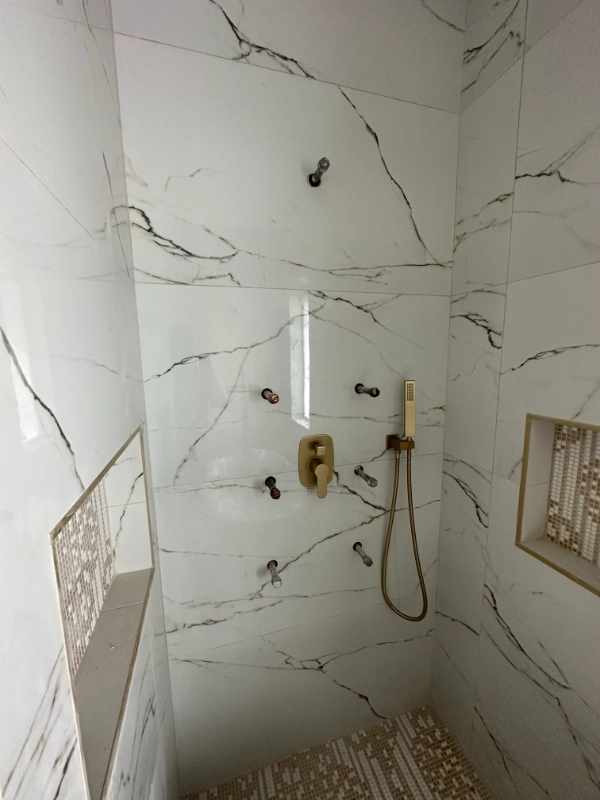
5. Body Sprays
6. Wall Mount
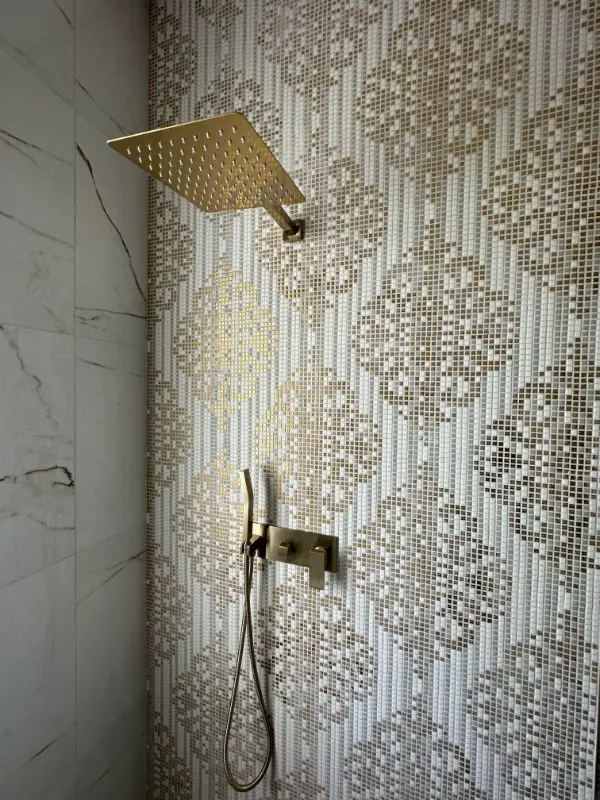
Walking Shower
1. Tile for walls and mosaics for floors.
2. Tile for floors and walls.
3. Quartz panels for walls and mosaic for the floor.
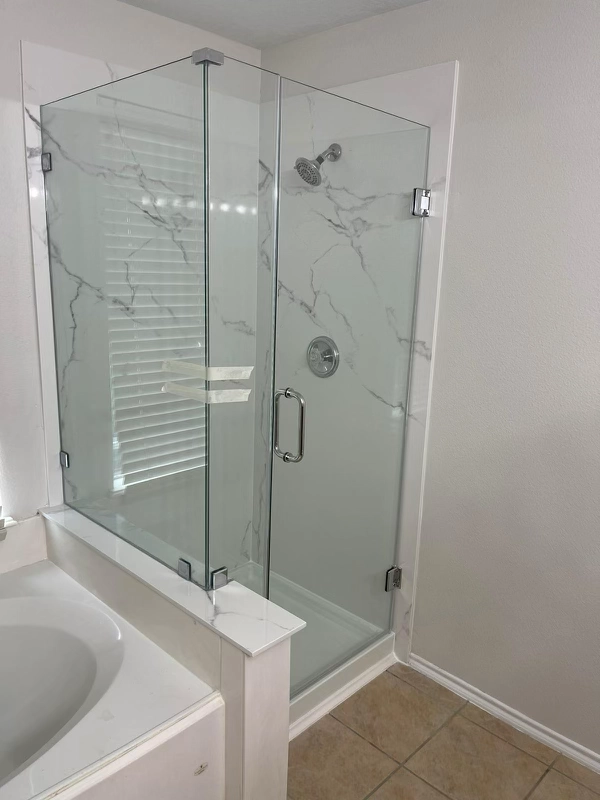
Shower Glass Door Installation Houston
1. Frameless glass door
2. Frame glass door
Bath Cabinets
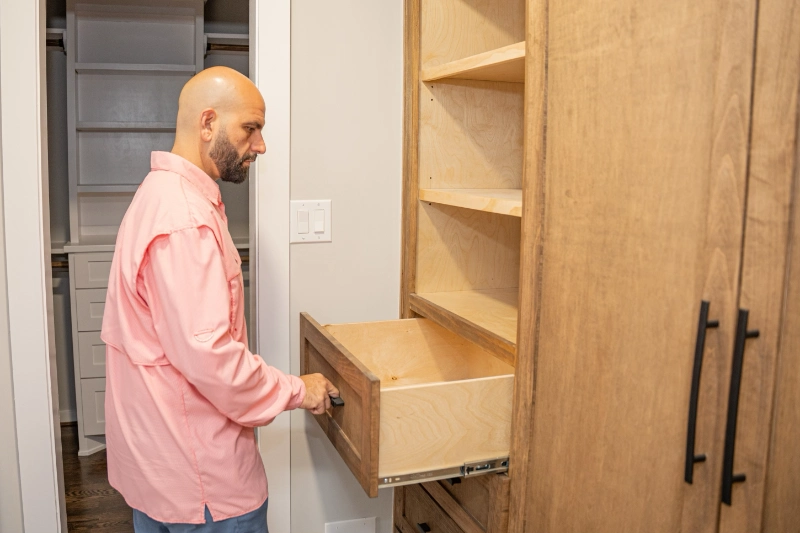
We work from design and manufacturing with high quality materials. We offer to paint them with Sherwin Williams or Stain paint depending on the client’s taste.
Most common materials for manufacturing custom vanities and linen closets:
1. UV Birch
2. Poplar
3. Red Oak Wood
4. Plywood
5.Maple Wood
Bathroom Vanity Backsplash Installation: Your Guide to a Stunning Bathroom Upgrade
Bathroom vanity backsplash installation is a crucial step in bathroom remodeling. To achieve a finished look and protect against spills, proper installation is key. In this guide, we’ll cover gathering the necessary tools and materials, cleaning the surfaces, applying adhesive and caulk, and ensuring proper curing time. Enhance both functionality and aesthetics with this DIY project for a stunning bathroom upgrade. Emflaroma Solutions, based in Georgia, USA, can assist with your installation needs.
Gathering Tools and Materials
Before starting the bathroom vanity backsplash installation, it’s crucial to gather all the necessary tools and materials. This ensures a smooth and efficient process. Here are the key steps to follow:
Cleaning the Vanity Top and Wall
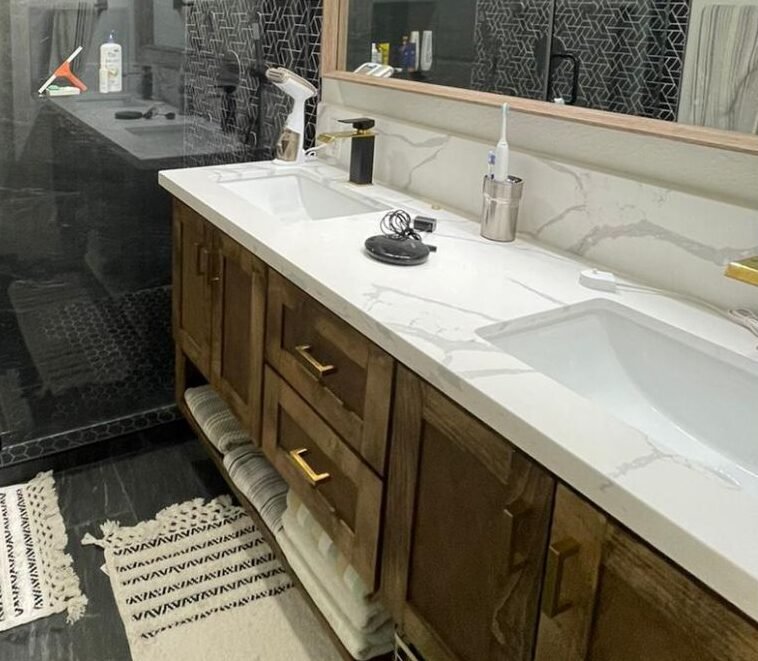
Start by cleaning the back edge of the vanity’s top and the portion of the wall where the backsplash will be attached. Use a damp shop cloth to eliminate any grease, soapy residue, dirt, or dust. Ensure both surfaces are thoroughly cleaned to provide a solid foundation for the installation.
Preparing the Backsplash
In addition to cleaning the vanity and wall, it’s equally important to clean the backsplash itself. Remove any dirt, grease, or adhesive residue from the backsplash using a suitable cleaner. This step ensures optimal adhesion and a clean, finished look.
Once you have gathered all the necessary tools and materials and prepared both the vanity top and backsplash, you are ready to proceed with the installation process. This careful preparation ensures a successful and professional-looking bathroom vanity backsplash installation.
Ensuring Proper Fit and Applying Urethane Adhesive
To ensure a seamless installation of your bathroom vanity backsplash, it is crucial to ensure a proper fit and securely attach it using urethane adhesive. Here are the steps to follow:
- Confirm Fit: Before applying any adhesive, double-check that the backsplash aligns perfectly with the vanity top. This will ensure a cohesive and professional appearance.
- Preparing the Surface: Clean the backside of the vanity and the area of the vanity top where the backsplash will be placed. Remove any debris, dust, or grease that may affect the adhesive’s effectiveness.
- Apply Urethane Adhesive: Using a caulking gun, apply a thin, even layer of urethane adhesive to the backside of the vanity. Be sure to spread it evenly, covering the entire surface to guarantee a strong bond with the backsplash.
- Position the Backsplash: Carefully position the backsplash onto the vanity top, aligning it with the edges and making sure it fits snuggly. Press it firmly against the vanity top to create a secure bond.
- Clean Excess Adhesive: Check for any excess adhesive that may have squeezed out from behind the backsplash. Use a damp cloth or sponge to wipe away any visible residue.
Remember, urethane adhesive provides excellent strength and durability, ensuring that your backsplash remains securely attached for years to come. Follow these steps diligently to achieve a professional-looking and long-lasting installation.
Applying Silicone Caulk and Securing the Backsplash
Once you have ensured a proper fit between the backsplash and the vanity top, it is time to secure it in place using silicone caulk. Silicone caulk provides a watertight seal and helps to prevent moisture from seeping behind the backsplash.
To begin, apply a thin, even line of silicone caulk along the vanity top where the backsplash will sit. Use a caulk gun for precise application. Make sure there are no breaks in the caulk line for a seamless finish.
With the caulk applied, firmly press the backsplash against the wall and the caulk on the vanity top. This will help eliminate any gaps and ensure a secure installation. Pay attention to the alignment and make any necessary adjustments before the caulk sets.
If needed, use painter’s tape to temporarily secure the backsplash in place while the caulk cures. This will prevent any accidental movement that may disrupt the installation process.
Take a step back and check for any visible gaps or irregularities. If you notice any, gently reposition the backsplash to fix the issue. Remember, attention to detail is key for a professional-looking result.
Allow the silicone caulk to cure for the recommended time, typically 24 hours. During this period, avoid touching or putting any pressure on the backsplash to ensure a strong bond between the adhesive and the surface.
After the curing time has passed, remove the painter’s tape, if used, and inspect the installed backsplash. If everything looks secure and aligned, congratulations! You have successfully applied silicone caulk and secured your bathroom vanity backsplash.
It’s important to note that proper curing time and technique are crucial for the longevity of the installation. Be patient and avoid using the vanity until the caulk has completely cured.
In conclusion, by following these steps and applying silicone caulk, you can effectively secure the backsplash in place, preventing moisture damage and adding a polished touch to your bathroom vanity installation. Take your time, ensure a proper fit, and allow for sufficient curing to achieve the best results.
Allowing for Proper Curing Time
Once the backsplash is firmly pressed against the wall and vanity top, it is crucial to allow for proper curing time. This step ensures that the urethane adhesive and silicone caulk properly set and bond, providing a secure and long-lasting installation.
It is recommended to allow the adhesive and caulk to cure for at least 24 hours before using the vanity. During this time, it is important to avoid any contact or pressure on the backsplash to prevent any potential shifting or damage. Patience is key to achieving a professional and durable bathroom vanity backsplash installation.
While waiting for the curing process to complete, it’s a good idea to refrain from using excessive water or cleaning products near the backsplash area to avoid interfering with the curing process. Be mindful of the surrounding environment to ensure optimal results.
Once the curing time is complete, carefully remove any painters tape used to temporarily secure the backsplash. Inspect the installation for any gaps or areas that may require touch-ups. If necessary, apply additional caulk to achieve a seamless and polished look.
Remember, allowing adequate curing time is crucial for the overall success and longevity of the bathroom vanity backsplash installation. Take this opportunity to prepare and plan for the next steps, such as organizing and decorating the rest of the bathroom to complement the new backsplash.
Enhancing Functionality and Aesthetic Appeal
When it comes to bathroom vanity backsplash installation, it’s not just about functionality; it’s also about enhancing the overall aesthetic appeal of your bathroom space. By choosing the right backsplash design, you can elevate the style and create a cohesive look that complements your existing décor.
One of the key factors in enhancing functionality and aesthetic appeal is selecting high-quality materials for your backsplash. Consider durable and waterproof options like ceramic tiles, porcelain, or natural stone. These materials not only offer excellent protection against water damage but also come in a variety of colors, patterns, and textures to suit your personal style.
In addition to the material, the layout and design of your backsplash can make a significant impact on the overall appearance of your bathroom. Whether you prefer a classic subway tile arrangement or a unique mosaic pattern, the possibilities are endless. Don’t be afraid to get creative and choose a design that adds visual interest and complements the rest of your bathroom’s elements.
Color coordination is another crucial aspect to consider when enhancing aesthetic appeal. Your backsplash should harmonize with the vanity, sink, countertop, and overall color scheme of the bathroom. Whether you opt for a monochromatic look or want to create a bold contrast, selecting complementary colors will tie the whole space together and create a visually pleasing atmosphere.
Lighting also plays a vital role in highlighting the functionality and visual appeal of your bathroom vanity backsplash. Consider incorporating task lighting above the vanity area to illuminate the backsplash and enhance its beauty. This will not only make your backsplash stand out but also create a warm and inviting ambiance in your bathroom.
Lastly, don’t forget to pay attention to the fine details. The proper selection of grout color can immensely impact the overall aesthetic of your backsplash. Choose a grout color that either matches or contrasts with your tiles, depending on the desired effect. Additionally, consider adding decorative elements such as edging or trim tiles to give your backsplash a unique and personalized touch.
By focusing on enhancing both functionality and aesthetic appeal, your bathroom vanity backsplash installation will undoubtedly become a standout feature in your bathroom. With careful consideration of materials, design, color coordination, lighting, and attention to detail, you can transform your bathroom into a stylish and functional space.
Call for a quote
832-3016654
We are endorsed by the BBB and are A+ certified so our clients feel secure when working with us.

Frequently Asked Questions.
Cost to remodel a house in Texas by square foot?
Remodeling expenses for a house can differ based on factors such as the house’s location, size, materials utilized, and the intricacy of the project. On average, the cost to remodel a house in the United States typically falls within the range of $18 to $200 per square foot.
How long does a kitchen renovation take?
The duration of a kitchen remodel depends on the complexity of the project, the size of the kitchen, and the extent of work involved.
How much does it cost to remodel a bathroom?
Half-bath $2,500–$5,000
Full bath $6,000–$20,000
Most expensive kitchen remodel items
Custom cabinets, tailored to fit the precise dimensions of your kitchen, are the priciest option among different types of kitchen cabinets..
How much paint do I need to paint my house?
- House size: When it comes to a 1,500 square foot house, you can expect to need approximately 15-20 gallons of paint per coat for proper coverage..
- Type of paint:Using a semi-gloss paint rather than a flat paint will provide greater coverage, reducing the amount of paint required.
- Number of coats: To achieve a smooth finish, it is recommended to apply two coats of paint.